Flower Love

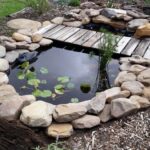
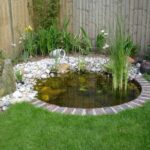
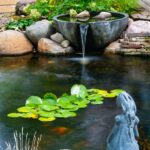
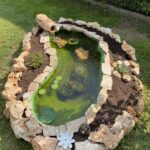
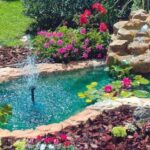
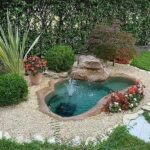
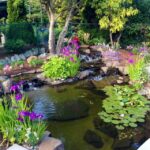
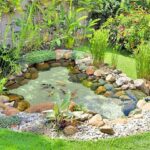
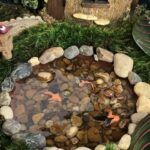
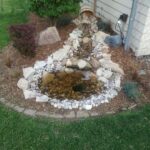
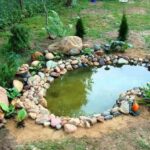
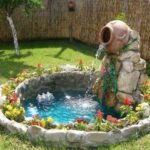
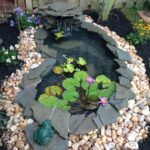
A garden pond adds beauty, elegance and lively interest to a garden. Whether it’s a fish pond, a catch basin for a waterfall, or simply a tranquil body of water for meditation and reflection, a garden pond is a focal point that enhances almost any yard.
To successfully create a natural-looking garden pond, it helps to follow some basic guidelines to make construction smoother and for easier continued maintenance of the pond.
01
of 15
Smooth the perimeter of the garden pond to close the tolerances
When digging the hole for the garden pond, remember that a garden pond’s water level is only as high as the lowest point on the pond’s perimeter. In other words, the entire perimeter of the garden pond must be as close to the same height as possible.
This may be a point that seems obvious from afar, but when digging the pond it can often escape attention. Since an exact level is not possible, think in terms of deviation and tolerances.
For example, if your chosen pond depth is 24 inches, the deviation of the perimeter from that height should be as small as possible: only an inch or two.
02
of 15
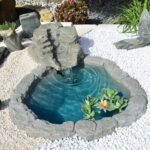
Decide if the pond should be shallow or deep
The depth of the garden pond is an important decision that affects both the cost and the possible appearance of the pond.
As the pond gets deeper, the bottom becomes less visible and rock cannot be seen. Fish can hide away, hidden. Deeper ponds also require the use of additional expensive pond liners.
Shallow ponds are better for displaying decorative rocks on the bottom and fish are more prominent. But shallow ponds tend to build up algae faster because the light can reach more of the water with greater intensity.
03
of 15
Protect the pond bottom from burrowing animals
Burrowing pests such as groundhogs and moles can dig up holes in a lawn and garden. When you have a burrowing animal in your yard, it seems like you’re always filling in holes.
But the problem goes well beyond the point of annoyance when the burrowing critter comes out from under your garden pond and chews off the pond liner in the process.
The solution is to lay down a metal mesh called hardware cloth as the base of your dustpan before shoveling a few inches of dirt over it. Then the substrate and liner go on top of the dirt layer. If your sides are dirt, not retaining wall blocks, you should also add hardware to the sides.
04
of 15
Combine any dust size with dust lining size
A garden pond can only be as large as the size of its underlying pond liner. So, long before any shovel meets the dirt, you need to figure out how big the pond should be, in conjunction with the size and price of the pond liner.
Quality dam liners made from ethylene propylene diene terpolymer (EPDM) are very expensive. PVC liners are expensive but less than EPDM.
In a project that involves the use of free or low-cost materials such as stone, concrete slabs, retaining wall blocks, and the lowest cost item of all, water, spending hundreds of dollars for one sheet of liner can seem like a big expense. purchase.
If your budget is tight, the cost of the pond liner will always dictate the size of the pond. On the other hand, you may find that spending a little extra money on a high-profile project like this is worthwhile.
05
of 15
Early form nuances are often lost
When you initially create the shape of the pond, you may find yourself adding special curves and inlets that you feel will give the garden pond a unique look.
However, these early delicate nuances often become softer and obliterated with each subsequent stage of pond construction. Adding substrate, feed, rocks to the bottom of the pond, and especially rocks along the shore of the pond all contribute to this softening process. Think in terms of basic shapes.
06
of 15
Add a top drain to the design
Unless you live in a dry, arid climate, your pond will inevitably overflow. But even in dry areas this can happen when you fill up the hose and let time slip away. Instead of letting the dam topple over and crash into your foundation, create a predictable spillover point so the water can go to a safe location.
07
of 15
Avoid tall, vertical garden pond walls
The more vertical and high the walls of the garden pond, the more difficult the job you will have when applying stone to the pond. Loose natural stones are difficult to stack vertically. Not only does the stone tend to fall, but a larger amount of stones or larger stones are needed to cover this area.
Small stones are cheaper but difficult to stack. Large stones cover vertical spaces more easily but are costly and difficult to move. Try to keep garden ponds at a 45-degree angle or less, if possible.
08
of 15
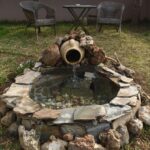
Install a permanent external water filter and skimmer
Unless you make provision for a permanent water filter mounted in the wall of your pond, your only options for filtration will be manual skimming or liquid filtration devices.
Hand foaming is a constant job, while liquid filters take up a lot of water surface and are unsightly. A permanent water filter mounted on the side of the pond stays out of the way.
Since it is automatic, it will turn on at set intervals. While a permanent filter is more difficult and expensive to install initially, it makes for easier dust maintenance in the long run.
09
of 15
Terrace pond Bottom
Sloping garden pond banks, if angled sharply enough, result in rock sliding at the bottom and sides of the pond. Instead, terrace the sides and bottom of the garden pond, much like agricultural terraces or steps and steps.
Keep each patio riser no more than about 6 inches high to avoid stacking stones too high. Create terraces by cutting them directly into the dirt with the shovel, as long as the dirt is packed tightly enough to hold its shape.
10
of 15
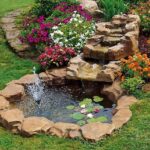
Plan to cover the dust liner
Every square inch of dust lining must be covered. Even the best, most expensive dam liner is exposed to the sun’s punishing UV rays and will fail.
The way to protect against deterioration is to cover the entire liner with something permanent, such as rocks along the sides, river rocks or smooth gravel on the bottom. It is better to think in advance about how you want to cover the lining. Doing it after the fact often means overloading the dust liner.
For example, if you keep the pond terraces low enough, you can use smaller stones. High terraces require larger, more visually intrusive filler items.
11
of 15
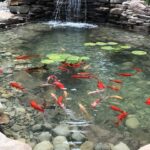
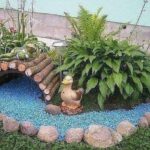
Be inventive when it comes to buying your stones
Garden ponds require a lot of rocks on the bottom and sides to cover up the liner. If you were to buy all the stones, the cost of the pond would increase significantly.
Instead, look around for rocks that you can use when you’re outside. When you go on a trip and find a legitimate source of rock, throw some in your car. Rivers are a good source of rounded river stones.
The beaches also provide an endless source of pebbles, round stones and sand. Just make sure you can legally take the stones.
12
of 15
Think about cleaning
One of the more dreaded aspects of owning a garden pond is cleaning it. Garden ponds collect leaves, dust, dirt and all kinds of debris. Eventually you have to drain the pond and clean it.
One way to make cleaning day easier is to create a dust floor that is smoother and easier to clean. Strongly rocked pond bottoms and those that are heavily textured are more difficult to clean. Only put down as much rock as is needed to cover the dust liner.
13
of 15
If possible, use an EPDM liner
Although PVC dam liners are much cheaper than EPDM liners, EPDM liners are usually worth buying, if you can afford it. EPDM liners are thicker and much more durable than PVC liners.
EPDM liners resist UV rays well, and even chemicals like chlorine are no match for EPDM. When heated by the sun, EPDM liners become pliable and fit well in the dust hole.
14
of 15
Use a variety of terracing methods
Terraforming the soil under and around the garden pond is of course the most popular way to give the pond its shape. The earth can be sculpted into a variety of shapes.
But for farms with sandy soils or other soils that don’t mold very well, it helps to use other molding methods. Cans of landscape foam, similar to insulating foam, are perfect for adding shape to curves.
Large sheets of insulating foam can be creatively cut and stacked to give the basic terraced shape of a garden pond.
15
of 15
Consider the effect of sunlight on the pond
Sunlight creates algae in garden ponds. Moving or angling the garden pond away from sunlight can help alleviate the problem.
If you want sunlight on your garden pond, you should look into natural algaecide or inhibitors. Some pond owners simply drain their ponds during the most light-sensitive times of the year to avoid algae altogether.