Flower Love
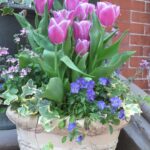
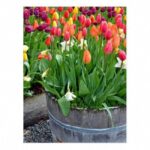
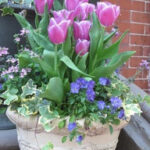
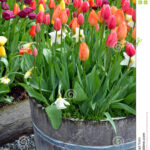
Tulips come in a wide range of colors, shapes, and sizes. There are over 3,000 registered varieties, categorized into 15 groups based on flower shape, bloom time, and plant size. Some popular types include:
- Single Early Tulips: These bloom early in the season and have a classic cup shape.
- Double Late Tulips: Known for their peony-like blooms, they add a lush look to the garden.
- Parrot Tulips: These have fringed and feathered petals, offering a more exotic appearance.
- Triumph Tulips: A mid-season favorite, they combine the best traits of Single Early and Darwin Hybrid tulips.
Choose varieties based on your climate, garden design, and personal preferences.
2. Preparing the Soil
Tulips prefer well-drained, sandy or loamy soil with a neutral to slightly acidic pH (6.0 to 7.0). Before planting, work organic matter like compost or well-rotted manure into the soil to improve fertility and drainage. Avoid waterlogged areas, as tulip bulbs are prone to rot in overly wet conditions.
3. Planting Tulip Bulbs
The best time to plant tulip bulbs is in the fall, about 6-8 weeks before the first hard frost is expected. This allows the bulbs to establish roots before the winter chill. Follow these steps for successful planting:
- Depth and Spacing: Plant tulip bulbs about 6-8 inches deep and 4-6 inches apart. The pointed end of the bulb should face upwards.
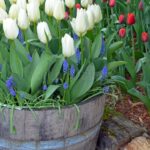
- Grouping: For a naturalized look, plant bulbs in clusters of 10-20 rather than in straight rows.
- Watering: After planting, water the bulbs thoroughly. This helps settle the soil and initiates root growth.
4. Caring for Tulips Throughout the Year
Tulips are relatively low-maintenance, but they still require some care to thrive.
- Watering: Tulips need consistent moisture, especially during the growing season. Water the plants when the soil feels dry to the touch. However, avoid overwatering as it can cause bulb rot.
- Fertilizing: Apply a balanced, slow-release fertilizer at the time of planting and again when the shoots first emerge in the spring. Avoid high-nitrogen fertilizers, as they promote excessive foliage growth at the expense of flowers.
- Mulching: After planting, cover the area with a layer of mulch to retain soil moisture and regulate temperature. Mulch also helps suppress weeds.
5. Deadheading and Post-Bloom Care
Once tulips have finished blooming, it’s essential to deadhead them (remove spent flowers) to prevent the plant from wasting energy on seed production. However, leave the foliage intact until it yellows and dies back naturally. This allows the plant to store energy in the bulb for next year’s growth.
6. Overwintering and Long-Term Care
In colder climates, tulip bulbs can be left in the ground over winter, but in warmer climates, where winter temperatures stay above 60°F (16°C), you may need to dig up the bulbs and store them in a cool, dry place until the next planting season.
- Digging Up Bulbs: If you choose to dig up your bulbs, wait until the foliage has completely died back. Gently lift the bulbs with a garden fork, clean off any soil, and let them dry in a well-ventilated area. Store them in a mesh bag in a cool, dry place.
- Replanting: After a few years, tulip bulbs may become overcrowded, leading to fewer blooms. Dig up and divide the bulbs every 3-5 years to maintain healthy growth.