Flower Love

Equipment / Tools
- Large spoon or garden trowel
- Small garden shears or scissors for trimming plant roots
- Spray bottle
Material
- Glass container without drainage hole, with or without top
- Clean aquarium gravel or small crushed rock
- Activated carbon (available at a nursery or pet store)
- Terrarium plants
- Sterile potting mix
- Leaf moss
- Decorative elements (optional)
:max_bytes(150000):strip_icc():format(webp)/how-to-make-terrariums-848007-06-1f975d3889884b2db98a1bf710da444b.jpg)
Instructions
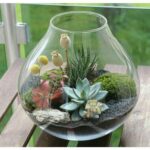
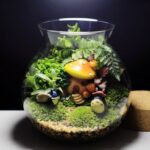
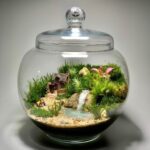
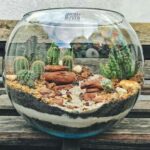
1. Select a container
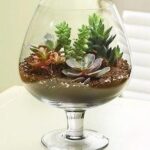
Choosing containers and plants is half the fun of making a terrarium. There are many specialized terrarium containers that you can buy, even some that look like miniature Victorian greenhouses or conservatories that sell for hundreds of dollars.
But you can use almost any transparent (glass or plastic) container with a wide mouth (with or without a lid) to create a terrarium. Suitable containers include aquariums, goldfish bowls, Wardian boxes, cold frames, bell jars, terrines, apothecary jars, cloches, mason jars, glass cookie jars and even large brandy snifters. A wide opening allows you to fit your hand into the container to add drainage material, soil, plants and decorative elements (shells, figurines or ornaments).
- Tip
Open terrariums are less likely to experience problems with condensation and fungal plant diseases than closed terrariums.
:max_bytes(150000):strip_icc():format(webp)/how-to-make-terrariums-848007-08-6c9ccde2f7df41f59c9632690b5fa8d3.jpg)
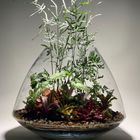
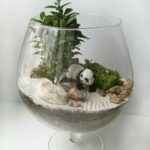
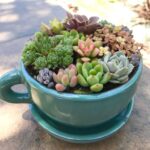
2. Choose the plants
Most garden centers carry miniature plants for terrariums, sometimes in the section of the store that carries funky garden supplies. Choose terrarium plants with different leaf shapes and heights that are small enough to fit in your container, preferably without touching the sides of the terrarium.
:max_bytes(150000):strip_icc():format(webp)/how-to-make-terrariums-848007-09-0962a9bc5fc34ae399da207ecc15f945.jpg)
3. Add drainage layer
A terrarium container has no drainage holes, so you need to create a drainage layer to keep water away from the plant roots. Start with a 2-inch layer of gravel or crushed stone in the bottom of the terrarium. A tall, narrow terrarium requires a deeper layer of drainage stones than a wide, shallow container.
Then, use a large spoon or trowel to add a 1/4-inch to 1/2-inch layer of activated charcoal on top of the rocks to help with drainage and control any odors.
:max_bytes(150000):strip_icc():format(webp)/how-to-make-terrariums-848007-10-273473a10e11458c8b5c69d68711ea8e.jpg)
4. Add moss and potting mix
Then add a layer of leaf moss over the rocks and charcoal to prevent mixing in the next layer, the potting soil. The moss also adds visual interest to your terrarium.
Using a large spoon or small trowel, add slightly moist, sterile potting soil on top of the moss. Do not use a potting soil mix with fertilizer already incorporated; terrarium plants do not need the extra fertilizer.1
Add as much potting mix as you can – at least a couple of inches. Be sure to keep the soil level low enough to allow the plants to fit in the container with room to grow but without touching the top of a closed terrarium.
:max_bytes(150000):strip_icc():format(webp)/how-to-make-terrariums-848007-13-58ad30a4238043e489d8deaba771e7c2.jpg)
5. Prepare the plants
Before planting, decide on the design of your terrarium. Choose places where you will place tall and short plants and where you will create mounds and dips in the soil to create interesting contours.
Remove the plants from their nursery pots. If a plant is root-bound, tease the roots apart or use a pair of small garden shears to snip off some of the longer roots. Removing certain roots, called root pruning, will delay a plant’s growth, which is important when growing plants in a terrarium. Also cut off any yellowed or damaged leaves.
:max_bytes(150000):strip_icc():format(webp)/how-to-make-terrariums-848007-15-4265840f40924c44bf3584087b799cd9.jpg)
6. Add plants
Shake off any excess soil left on the plants. Use a long spoon or your fingers to dig a planting hole for each plant. Place each plant in its hole and gently pat down the soil to eliminate air pockets and secure each plant firmly in the potting medium.
- Tip
If the terrarium has a narrow opening, use chopsticks, tongs or long tweezers to place the plants in the terrarium and pat them in. Take a tip from Tovah Martin’s book, “The New Terrarium,” and put a cork on the end of the terrarium. a skewer or chopstick to trample down the soil.
:max_bytes(150000):strip_icc():format(webp)/how-to-make-terrariums-848007-17-0de9d7360c8b487dae2de0d14aa6468d.jpg)
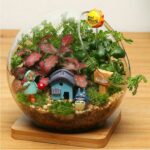
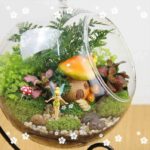
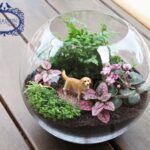
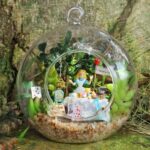
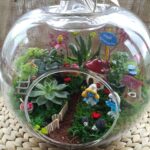
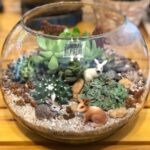
7. Decorate
If you want, you can decorate the inside of the terrarium with small figures, shells, decorative stones or other whimsical accents distributed between the plants.
:max_bytes(150000):strip_icc():format(webp)/how-to-make-terrariums-848007-18-f59e028425574341a6f7faf77fe8a452.jpg)
8. Water the terrarium
Use a spray bottle or small watering can with a rose attachment on the spout to water the plants so that they are just moist, but not soaked. Use the spray bottle to clean off any dirt that sticks to the glass sides of your container, which you can then wipe clean with newspaper or a paper towel.
:max_bytes(150000):strip_icc():format(webp)/how-to-make-terrariums-848007-21-1b4bee47a96a426d8e3b1a021fdcd65d.jpg)
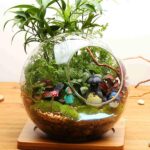
9. Maintain the plants
Most terrariums do best in a location that gets lots of filtered light, but not in strong direct sunlight, where the terrarium can get hot enough to bake the plants inside. Slightly shaded south-facing windows can be ideal. If you don’t have enough natural filtered sunlight—like if your house is surrounded by shade trees—artificial grow lights will help your plants thrive. LED or fluorescent artificial lighting generally doesn’t produce much heat, so your plants can get as much light as they need to thrive.
Maintaining a terrarium is easy. Do these three tasks every few weeks:
- Feel the soil to see if it is dry and needs water. Partially and completely closed terrariums retain water significantly longer than most houseplants.
- Inspect a closed terrarium for condensation. Remove the top at least once a month to increase airflow. Leave the top off until the condensation disappears. Also remove the terrarium top if you added too much water.
- Remove yellowing or damaged leaves and prune plants to a smaller size if they grow too large for the container.
- Never fertilize the plants in a terrarium. Terrariums provide their own nutrients through the natural decay of the potting mix.3